In OCRIS Mobile it is possible to do data entry by columns as well as rows. This functionality is particularly useful for speeding up geology logging; enter the intervals first then add attributes in the cells at the depth they change. Then either select the Copy or Fill functions to fill in the gaps.
Initial Population
In the screenshot below you can see that the intervals have been populated and then where the various attributes change.
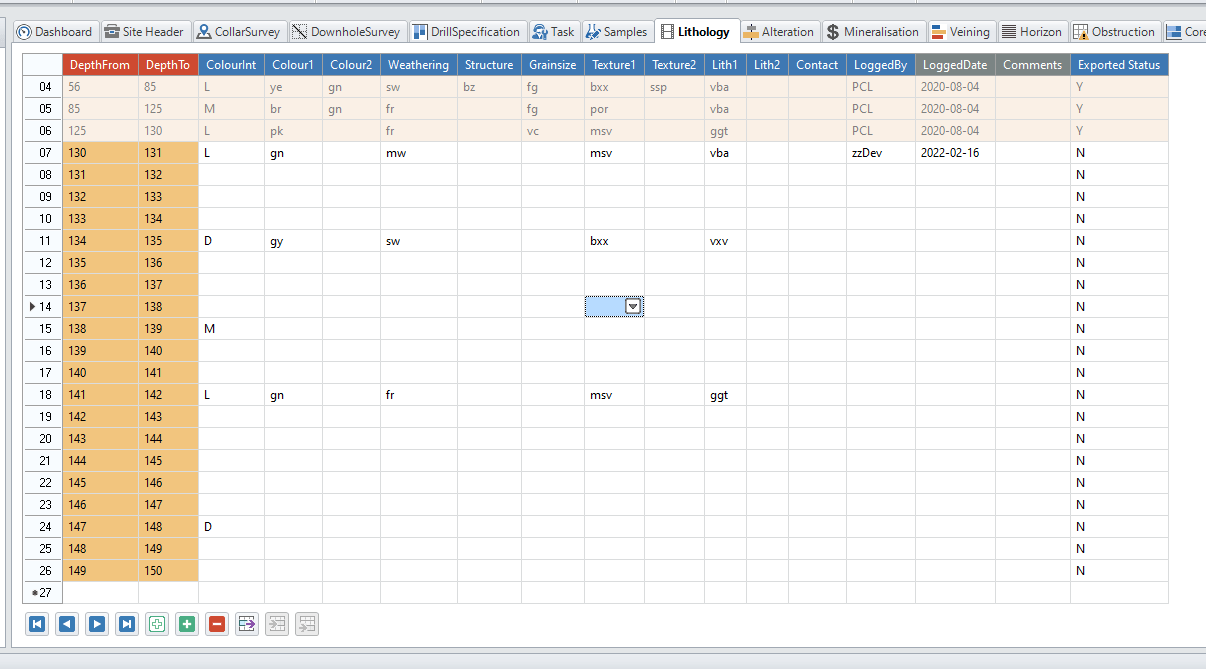
In the screenshot below the grid has been partially completed using the data entry shortcuts.
Copy Once
The ColourInt column was copied down using the Copy Once function
![]()
. If you select the Copy many button you will be prompted to enter how may rows you want to populate.
Fill to Next
![]()
The Colour1 column was filled in using the Fill to next fuction. OCRIS Mobile copies down the data until it reaches a populated cell.
Fill to End
![]()
The Weathering column was filled in using the Fill to end function. OCRIS Mobile copies down the data until it reaches a populated cell and then changes to that value down until the next change. This continues to the bottom of the worksheet.
Adding Data
Sometimes depth data are entered before other, related data such as SampleID in a Sampling sheet. To complete the data such as an incrementing SampleID use the
Add once
![]()
or Add manyfunction.
![]()
Add once will increment the value in the active cell by 1 into the cell below.
Add many will prompt you to choose how many rows to populate and the increment to apply.
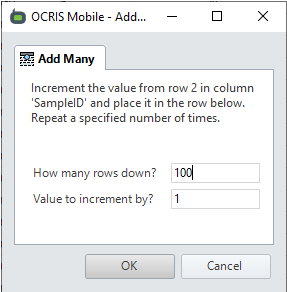
If you want to dd Many to the end of the worksheet chose a large number. OCRIS Mobile will not add rows beyond the last existing record with this function.
Comments
0 comments
Please sign in to leave a comment.